Tuesday, January 4, 2011

The New and Improved Homemade Bazooka Tube

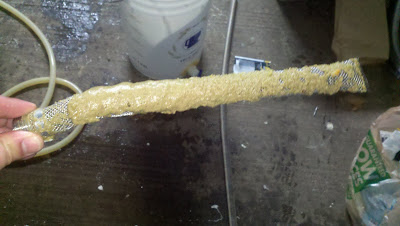
Ok, so here's another $12 modification I did. I bought the bazooka tube last week and put it to the test. It worked well, but could be even better so I set out on a mission. I did some perusing on the homebrewtalk and looked at variations of homemade bazooka tubes. Quickly, I jumped on McMaster Carr's industrial needs website and ordered 1 stainless steel hose clamp and a 30x30x.0056 stainless steel mesh screen, delivered for $12.

I did this because the purchased bazooka screen is straight and my drain port is about 3 inches above from the bottom of the kettle, therefore when I brewed the orange pale ale and tested out the new mods I had to tilt the keg when trasnferring into my fermenter for the last 3 gallons. It's no big deal really, but I like automation, hence the overkill homebrew rig. This new mod would allow my to use my 90 degree siphon tube and suck up all wort, literally all wort. I did a test tonight and took pictures, because sometimes pictures are better than words.


Luckily, trash day isn't until tomorrow, so I still had my lawn can (yes, Bristol township collects lawn debris weekly and they have a trash can dedicated to it) filled with spent grains and a pile of 6 ounces of hops on top. Yeah, i consider it lawn debris and they don't seem to mind either as they do collect it from me. Needless to say, I scooped out the 6 ounces of hops and even a few scoops of whole grains and put them in my boil kettle with 5 gallons of water. I heated up the kettle for about 10 minutes until the hops infused with the water.


The test here assumes that my hopbag didn't exist and I only relied on my homemade bazooka screen. Albeit, I will be using both on future brews for added comfort and convenience of chilling and recirculating the wort. FYI, 6 ounces is a lot of hop additions for one brew (hence the pale ale I was making).


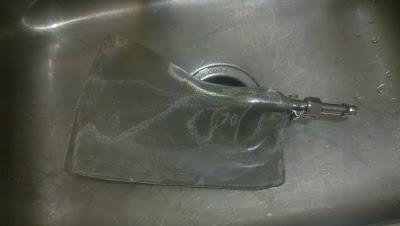
Check out the pics of the homemade bazooka screen in action.


Here is a pic from a side view. You can see the 90 degree elbow siphon tube.

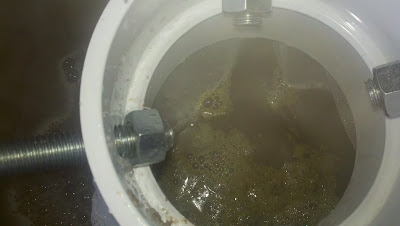
After installing the bazooka screen, I boiled 5 gallons of hop water. I funneled it out and this is what you see; hoppy green water.
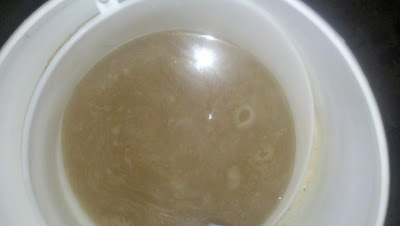
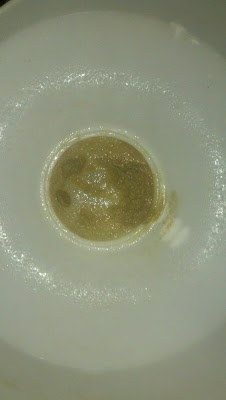

Then I let it funnel through the super fine funnel mesh and this was all the hops that got through. You'll never collect all of these tiny hop particles, but this is impressive. Here is the funnel with about 1 tablespoon of hop particles in 5 gallons passing.

Obviously, everything that was trapped by the bazooka tube is left behind, as it is supposed to be. Here is the boil kettle filled with hop sludge and grain, amongst the bazooka screen.
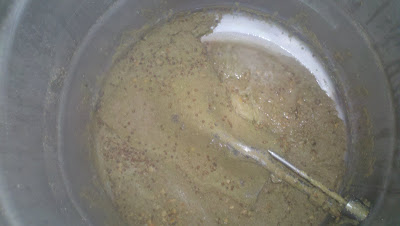


Here is the bazooka screen after doing it's job. Some particles were on the inside of the screen as some did pass through. As you can see from above, only .01% of the hop sludge made its way through.

As you can see here. I siphoned everything out except for the sludge and tilted the keg on it's side to show that about 2 cups of wort are remaining. I could fight for those last 2 cups, but I'd rather account for it in Beersmith (brewing software) and calculate my batch size for .25 gallons lost to sludge. Gotta love brewing software.
That's it for today folks. Now I just need your help in deciding what to brew next in order to put the hopbag and homemade bazooka screen to the test.


Cheers!

Sunday, January 2, 2011

Beer Styles - BJCP - What Should I Brew?

I am constantly pondering for a beer to brew and am always going back to my favorite styles; belgians, wheats, and IPA's. The reality is that there are numerous beer styles to choose from. The following styles are recognized by the Beer Judge Certification Program (BJCP).

The following is a quote from their website www.bjcp.org explaining their purpose.

"The purpose of the Beer Judge Certification Program is to promote beer literacy and the appreciation of real beer, and to recognize beer tasting and evaluation skills. We certify and rank beer judges through an examination and monitoring process.

The BJCP was founded in 1985 and has administered the Beer Judge Examination to 5,875 individuals worldwide. 3,647 are currently active judges in the program, with 540 holding the rank of National or higher. Since we started keeping detailed records, our members have judged over 590,931 beers and we have sanctioned over 4,208 competitions. "


The BJCP is the official database for beer styles and defines the parameters needed to meet a particular style. They judge beer, mead, and cider. Here is the list. So read them and let me know what I should brew next. You can find the full style guidelines here: http://www.bjcp.org/docs/2008_Guidelines.pdf

American Amber Ale
American Barleywine
American Brown Ale
American IPA
American Pale Ale
American Stout
American Wheat or Rye Beer
Applewine
Baltic Porter
Belgian Blond Ale
Belgian Dark Strong Ale
Belgian Dubbel
Belgian Golden Strong Ale
Belgian Pale Ale
Belgian Specialty Ale
Beglian Tripel
Berliner Weiss
Biere de Garde
Blonde Ale
Bohemian Pilsner
Braggot
Brown Porter
California Common
Christmas/Winter Specialty Spice
Classic American Pilsner
Classic Rauchbier
Common Cider
Common Perry
Cream Ale
Cyser
Dark American Lager
Doppelbock
Dortmunder Export
Dry Mead
Dry Stout
Dunkelweizen
Dusseldorf Altbier
Eisbock
English Barleywine
English Cider
English IPA
Extra Special/Strong Bitter (ESB)
Flanders Brown Ale/Oud Bruin
Flanders Red Ale
Foreign Extra Stout
French Cider
Fruit Beer
Fruit Cider
Fruit Lambic
German Pilsner (Pils)
Gueuze
Imperial IPA
Imperial Stout
Irish Red Ale
Kolsch
Lite American Lager
Mailbock/Helles Bock
Metheglin
Mild
Munich Dunkel
Munich Helles
New Englan Cider
Northern English Brown Ale
Northern German Altier
Oatmeal Stout
Oktoberfest/Marzen
Old Ale
Open Category Mead
Other Fruit Melomel
Other Smoked Beer
Other Specialty Cider/Perry
Premium American Lager
Pyment
Robust Porter
Roggenbier (German Rye)
Saison
Schwarzbier (Black Beer)
Scottish Export 80
Scottish Heavy 70
Scottish Light 60
Semi-Sweet Mead
Southern English Brown Ale
Special/Best/Premium Bitter
Specialty Beer
Spice, Herb, or Vegetable Beer
Standard American Lager
Standard/Ordinary Bitter
Straight Lambic
Strong Scoth Ale
Sweet Mead
Sweet Stout
Traditional Bock
Traditional Perry
Vienna Lager
Weizen/Weissbier
Weizenbock
Witbier
Wood Aged Beer

That's it folks. Which of these seem appealing?

cheers!

Thursday, December 30, 2010

The Good....and the Bad....Back to Back Brew Sessions

12.27.10 began the nightmare of the Drunken Uncle Dunkelweizen. Sure, I thought it would be easy. I made a yeast starter Christmas night and was set up for an easy morning sanitation and simple dark wheat brew session. So I thought at least. I should have realized almost immediately that this was going to be bad. I hooked up the hose to start washing down my system when it froze almost instantly. No worries though, I disconnected the hoze and hooked it up where my washer connects to the water supply.

The overall brew session went fine in the first half of the day. We hit our strike in temps, held our mash temps, and properly stepped up our mash. It was when we sparged that we noticed a great deal of grain passing through the silicone tubing. I've noticed it before when doing batches so I didn't think much of it. The false bottoms help to keep grain out, help being the key word. We would later realize that about 2 gallons of volume was due to grain occupying the boil kettle.

Needless to say, we couldn't tell how much grain was in the boil kettle until we drained the cool wort out, but cooling the wort turned out to be a 3 hour fiasco. Grains got through the 3-piece ball valve, but clogged in the therminator (lead chill plate system).

Initially we weren't sure of where the clog was coming from so we tested all avenues of possibility. We confirmed that flow was passing through the 3-piece drain valve, through the pumps and back up through the outlet side of the pump, but not the therminator. We put the keg in a pile of snow but the snow was not match for the volume of hot wort. It was at that point we decided to drain out the wort into the fermenters, cap it with an airlock to prevent contamination, and let it sit over night to chill before pitching the yeast.

While it was fun in the beginning, it quickly became a brewer's nightmare and put a damper on the day. The good news is that we were sitting at 1.059 OG and pulled a quick fermentation time. The bad news is that we were supposed to extract 11.00 gallons of wort and ended up with 9+ gallons.

Here's the Drunken Uncle Dunkel fermenting through.

She'll pull through nicely I'm sure with that spicy, phenolic Weihenstephan Yeast, though I don't think I've ever had a true DunkelWeizen. First time for everything.

A Restless Evening

After that horrible brew session, I determined myself to remedy the situation. http://www.homebrewtalk.com/ was the source for some good answers. Here's what I came up with:
  1. A False Bottom is not enough by itself to stop trub and grain from getting through.
  2. A Hopbag adds protection
  3. A kettle screen (bazooka screen) supplements the grain bag and keeps everything out
  4. A whirlpool helps to keep trub to sides of kettle when draining.

I moved ahead with a few of these options. I bought a kettle screen and constructed a hopbag solely from homedepot parts. The hopbag was nothing more than 4 10" bolts, a 5" PVC connector pipe , a 5 gallon nylon paint strainer bag, and an adjustable clamp.

The hopbag is exactly what it says, but also more. When I transfer wort from the mash tun into the boil kettle, I let it pass through the hopbag to collect any loose grains, etc. I can then remove any loose grains collected and achieve my boil volume. Then, when I boil and add hops, some of the trub will remain in the hopbag, but unfortunately not all. The kettle screen adds to the equation by blocking any particles from passing through the drain valve. Marvelous!
Today I put the modifications to the test, and let me tell you was I pleased. I brewed up 10 gallons of Orange Pale Ale and ended up with 10 gallons in the fermenter. Here are some pics and videos of todays solo brew session.

The Hopbag I built for about $7.

Hopbag while transferring wort into boil kettle.
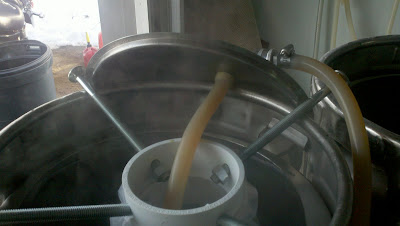
Hopbag with grains after transferring wort into boil kettle. It caught them
Hops in hopbag.

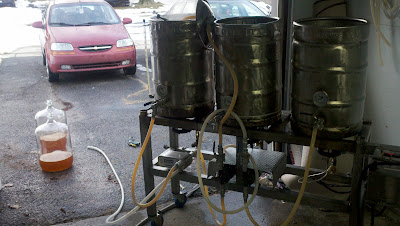
This is the setup when chilling wort with hose.
This is the setup chilling the wort with a recirculated ice bath
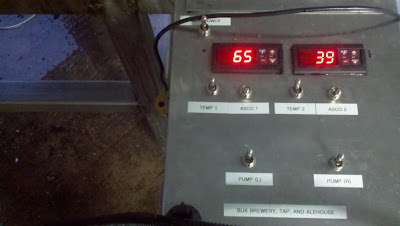
Here is a video of the chilling process, part 1: http://www.youtube.com/watch?v=M6nZ_qRwrbw

Here is a video of the chilling process with a recirculated ice bath made from snow, part 2: http://www.youtube.com/watch?v=aCfs1EX29g8

Chilled wort: 65F in a little over 15 minutes.

A lot of trub still gets past the hopbag as you can see here on the kettle screen.

Cheers!

Monday, December 6, 2010

Label Making


Completely unnecessary, yet so fulfilling. Making labels for my latest porter was a project and a half considering I have no photoshop skills, however, i think they turned out marvelous. I put about 85-90% of the work into and my soon-to-be wife took care of the kinks. I managed to do things with the software that she never figured out for herself. The difference between her and I is that she does it for work and I just clicked around and accidently ended up doing unwanted things.

Being that my graphic design skills are so basic, I stuck with a black and white design. Next time of course I will work on adding color, etc. I've been looking at labels from all types of beers and found some common components in many of them. Almost all are color, some utilize clear labels, but almost all have some facts, descriptions, and origins of the beer/brewery itself. In comparison, mine is black and white with some color, uses a white label, and has descriptions of the beer and some homebrew notations. For example, I have a statement that states, "Please recycle by returning empty bottles to Halbe."

I am doing this for pure enjoyment and that's it. Labels cost money, printer ink cost money, and bottles cost money. I can reuse the bottles in two ways. If I do the same batch again I can reuse the labels too. They hold fairly well. If I decide to do a different batch I can apply some heat and carefully remove the label and insert a new one. I could even half-ass it by just smacking a new label over top of the old. Actually, that brings up a funny point. Lagunitas Brewery in Cali decided to get very daring with their commercially available brews and started creating very whacky labels, infringing the copyrights of famous songwriters and remarks about LSD, jail, etc. Needless to say, the Cali government stepped in and they had to cease. Instead of pouring beer down the drain (Lagunitas brews about 50,000 barrels of beer per year), they just stuck duct tape over the infringement, crossed it out with crayons, markers, etc. People were buying good beer that came in a package that looked something like a moonshine bottle.

Anyway. Here is my first label. I may make some changes before I print them all out. I have to make sure the beer turns out well before I label 3 cases of porter. If it doesn't, then I will brew again. I am confident though. I hit my numbers and the beer tastes great pre-carbonation. I have come a long way in brewing over the past 3 years. What's really interesting is the palate and nose I am developing for beers. Take a look at the label and you will see that I already have a description of the beer and it's not even ready. This is in part because a pre-carbonation taste gives off the obvious flavors (nut, roast, etc) and the grains and hops tell me how it is going to pan out as well. So here's to it.

The holidays are gonna be great as I will have a keg of belgian dubbel on tap, a keg of porter on tap and 3 cases of porter to be consumed. On top of that, it looks as if we are brewing something between xmas and new years, so even more beer to come in the next few months. Let me know what you think.

Sunday, December 5, 2010

The Belgian Dubbel Experiment


Brewed 10.20.10
Fermentation: Primary 3 weeks, Secondary None
Kegged/Bottled: 11.14.10
Drinking: Now, but beer is a little green still

So we put the brewery to the test with this one, and it looks as if it is panning out as planned. After having worked out many of the kinks with my system and successfully brewing my biggest and most complex beer to date one can live by the notion that anything is possible. Sitting at a respectable 9.83% ABV and utilizing a complex grain bill, this beer enters my bloodstream as anticipated. The biggest challenge with a beer this high in alcohol content is masking the alcohol itself with the subtleties pulled through from the grain bill. Here's how it went down.

11.50 Gallon Batch
OG: 1.085
FG: 1.010
Color: 21.6 SRM
IBU's: 20.5
Calories: 375 cal/pint
Yeast: Trappist Ale WLP#500
Yeast Starter: Yes, 2 Liters

19.71 lb Pilsner 2-row (Belgium)
6.57 lb Munich Malt (20 L)
1.10 lb Caramunich Malt
1.10 lb Special B Malt

3.28 oz Saaz Hops (FWH, 90 Minutes)
2.74 lb Dark Belgiam Candi Sugar

Mash @ 150F 90 minutes, Boil for 90 Minutes

Double Batch Sparge

Ferment at 68F

There you have it. So if you took a close look you can see some very interesting things going on here. First, I had no secondary fermentation occurring here. Belgian beers and wheat beers tend to have a cloudy appearance as part of their character and style. Secondary fermentation assists in removing any haze by filtering out additional sediment. Depending on the beer, secondary fermentation may be required or may not. In this case it was not, but in the case of my recent porter it was mandatory.

Also, look at the brew date and the drinking notes. This beer was brewed almost two months ago and is considered green. A beer this complex requires aging to mellow out. I mentioned that it tastes a little green. This is for 2 obvious reasons, the first being that I can still taste the alcohol. It takes some aging to get the flavor in the grains to pull through and override any alcohol taste. Note that it wont entirely mask the alcohol but more so than it currently is. Secondly, the aging process assists in the removal of any yeast flavors and aromas. I mentioned that I used Trappist Ale Yeast and increased cell count with a 2 liter yeast starter. That is a lot of yeast, but it is needed to convert massive amounts of fermentable sugars over to alcohol, all 9.83% of it. My first swig a week and half ago was very yeasty in flavor. Since then, that unwanted flavor has subsided. I planned this beer just right because I wanted to drink some good beer just in time for the holidays. Looks like I will be.

Take a look at the calories in this recipe. The software I use, Beersmith, calculates the amount of sugars and starches possible to yield of each grain and converts that to calories through a formula I am unaware of and uninterested in learning. 375 calories is no Mich Ultra, it's more like a cheesecake dessert. I am not worried though because this is 2 beers and out. I don't see myself drinking 6 in a session, but you never know.

The hop schedule is the only simple thing about this recipe. The recipe calls for first wort hops @ 90 minutes, Saaz hops. This makes perfect sense. It's lower in the IBU scale, bitterness at 20.5. You don't need any aroma hops because all aromas will be coming from Special B and munich malts. You don't know any less or additional hop bitterness because quite frankly, you can't even taste it. Plus, the mellow notes coming from the special b and munich malts allow for quite the taste, especially when combined with the sweetness coming from the belgian sugar. Too much bitterness would downright kill a beer this tasty.

Conclusion

Great beer at 1/4 of the cost. 4 cases for $95. Not bad, considering a case of Chimay would be $100. That's the beauty of homebrewing. No marketing, taxing, and overhead to pay for. To end this topic I would like to thank bucky for helping me out. It was a long arduous process, but will definately be a repeat. I don't know what else I would change. I'll have to see how this mellows out and revisit the thought. I invite you to come over and drink a few with me. Hail a taxi on your way out the door, you'll need it.

cheerios!

Friday, November 12, 2010

Efficiency Mods: The Results

So going back to a story previously told in regards to measuring efficiency, I now have some results to share. Disappointed with how poorly I missed my target volume efficiency, I went about some new modifications. Simple, yet elegant. I put a few things into the sytem just tonight alone.

First, I installed a sight glass into the boil kettle. This sight glass protudes out of the keg and runs parallel on the outside of the keg in a vertical position. Picture this as the handle to a milk carton. The handle on the milk carton shows the level of milk equal to that of what is in the container. The sight glass serves the same purpose as a keg is non-transparent. It measures up in increments of 1 gallon, starting at 3 gallons and ending at 15 gallons. I can use a ruler to get half gallon, two-third gallon increments, etc if need be.

The installation consisted of drilling a 9/16" hole near the bottom of the keg, inserting a threaded elbow, washer, and silicone gasket. It took all but 10 minutes to install and already serves a timesaver. Now when I have to put 13.3 gallons of mashed wort into the boiler, I just look over and turn off the pump as needed.

My second test was to conduct an evaporation rate experiment. I put in about 11 gallons of water and heated to 150F. I then shut off the flame, and pumped out 1 gallon so my remaining volume equalled 10 gallons. I stopped at 150F because normally when I mash i am in the 150-155F range. I adjusted and recorded 3 various gas valves to maintain consitency on future brewdays.

1.) Opened propane tank valve to 'full open'
2.) Opened boil kettle burner valve to 'full open'
3.) Opened adjustable propane regulator 1.5x and even took a picture to eyeball it up next time.

After that, I let her rip and get to a full rolling boil for about 1 minute. This is when I will add hops and start my 60 minute, 75 minute, or 90 minute boil timer. For this experiment I set my 60 minute timer. I had exactly 10 gallons and had been maintaining 212F for 1 minute. It just so happened to be 8:54 PM. Needless to say, at 9:54 PM I put the flame out. I had just under 8.5 gallons remaining. According to Beersmith (software I use), my evaporation rate is at 12%.

12% is a little on the high side, but it may be something I work on down the road. I may have to do another experiment where I crank the heat from mash temp levels to boiling and then adjust the flame to maintain a very soft, gently rolling boil. It may make a difference, it may not. We may never know.

At least I know I have a 12% evaporation rate. I adjusted my equipment profile on beersmith to calculate for that. Last bacth we brewed started with 13.3 gallons of beer and ended up with about 8.5 -9 gallons in the fermenter. My target was 11. The equipment profile was set up for 9% evaporation, hence the loss. Now, the same recipe says start with 14.4 gallons in the boil to end up with 11 in the fermenter. I can and should be able to achieve that now.

The third modification was those dreaded pumps on the wort chiller. After I boil, my goal is to get the boiled beer from 212F to about 65F as fast as possible to prevent infection/bacteria, etc. My first two batches ever went fine, but the last 4 batches gave me nothing but problems. Some of the connections used are stainless steel couplers (threaded with teflon), some were non-teflonned, and some couplers were even plastic. I had leaks in multiple spots. This is where the problem was. Where there is a leak, air gets in. When air gets in, pumps can't prime, etc.

I swapped out every plastic couple for new ss ones and taped every connection. The flow rate increases dramatically and the pumps primed instantly. Batch 1 and 2 cooled from 212F to 65 in about 15 minutes. Batches 3-7 took about 45 minutes. Tonights test run took 11 minutes.

212F - 100F took 5 minutes

100F- 90F took 90 seconds

90F- 80F took 90 seconds

80-68F took 150 seconds

I couldn't believe it. Rarely do I attempt 3 things and achieve them all. I was perplexed and surprised with joy after successfully making all 3 modifications tonight. They went as planned. Now I am planning on making a nice, creamy porter to get me through these cold days of winter.

Take care......until next time

Tuesday, November 2, 2010

Efficiency: Why and What You Need to Know

Ok, so you already saw the prequel to this post The Yeast Starter. The good news is that the 2000ml yeast starter was sufficient in handling the fermentation associated with this Belgian Dubbel/Trippel Chimay Clone. The funny thing is that on brewday we overshot our OG and ended with a higher gravity than anticipated.

This is due to several factors:

1.) Set my efficiency too low at 75%.

2.) Increased the grain bill to make up for an anticipated lower efficiency at 68%.

3.) Increased Dark Belgian Candi Sugar to make up for an anticipated lower efficiency at 68%.

4.) Boiled hot an heavy and evaporated too much water.

So basically, while this beer is going to be great, it taught me that I still have to determine my efficiency on my system. I'd be happy by all means with an efficiency in the 80 percentile, but would be astonished and dumbfounded if I could get an efficiency in the 90 percentile.

Efficiency is determined by calculating the total grains available for brewday and calculating how many possible fermentables were converted. Evaporation rate also plays a factor in the calculation. Essentially, if I set my evaporation rate at 9% per hour and boil off exactly 9% per hour; and if I have 30 pounds of grains and extract all the possible sugars from these grains, then I have 100% efficiency. It raises a good question that I'd like to know the answer for. What are commercial brewery efficiencies like? I'd be willing to bet they get 85-94% efficiency (possibly more), while homebrewers get anywhere from 60-90% efficiency, depending on the setup and equipment used.

I thought my efficiency would be determined over the last 5 batches, but the factors keep changing batch after batch. Number one being, I brew something different and a different quantity every time. I will do a dry run with evaporation rate. I will transfer water to the boil kettle at 150F as that is a safe mash temp and begin to boil. The second the first bubbly boil rises I will record how many turns my propane regulator is open and determine my true boil off at 60 minutes and 90 minutes being that these are the two most common boil times. This will assist me in my entire 'brewhouse efficiency.' Then I will do a cheap 1 gallon batch of just 2-row pale malt to see what my yield is, by calculating the mash/sparge process to my preboil gravity. This will determine my mash efficiency.

By default, Beersmith (the software I use to handle all my brewing calculations) is set at a 75% efficiency. Therefore, the grain bill, water quantities, etc is assuming a 75% efficiency. If I undershoot that 75% efficiency, then I have a beer with lower alcohol content than intended. Yep, that would be very disappointing. However, If I overshot the default 75% efficiency, then I would have a stronger beer. While that doesn't seem bad at all, it has its consequences. It actually tells me that I depending more on chance than pure science. Proper note taking allows one to make the same beer over and over again, just the way that one Budweiser batch after the other taste exactly the same. If you have various factors on different brewdays, its harder to replicate that. The more you control, the better off you are. The more you leave up to chance, the more risk you ensue.

So, let's take a look at what happened to me on this particular brewday.

We will look at Target Volume, Efficiency into Boiler, and Actual Volume Efficiency.


Brewhouse Efficiency Based on Target Volume

Actual OG: 1.083
Estimated OG: 1.075
Brewhouse Efficiency: 75.00%
Actual Efficiency: 84.56%


Efficiency Into Boiler

Volume into Boiler: 13.27 gallons
Planned Boil Volume: 13.27%
OG into Boiler: 1.067
Estimated OG into Boiler: 1.067
Efficiency into Boiler: 78.09%


Efficiency Into Fermenter

Actual Batch Volume: 9.50 gallons
Planned Volume: 11.50 gallons
Efficiency calculated from Volume: 68.16%


So, after reviewing the above, you will see I overshot OG by overcompensating my grain bill. I hit my OG into the boiler and the 13.27 as planned so I ended up with 78.09% efficiency. That's great. Where I failed is the efficiency into the fermenter because I planned for 11.50 gallons but only ended up with 9.50 so I had a 68.16% efficiency. That means I definately boiled off too much. I had the flame set too high. Once I determine my evaporation rate, it looks like my brewhouse efficiency would be 84.56%. That'll be something to be proud of. I'll send updates once I work on that.

Once I do that, I can set beersmith to calculate everything from grain bill to hop quantities to water needed to everything else at 85% and won't have to adjust anything. Like I said earlier, I assumed a 68% efficiency so I added more grains and more belgian candi sugar, and as a result ended up with an 84.56% efficiency in regards to Alcohol Content but underscored in regards to my final volume at 68.16%. I was supposed to have 11.50 gallons of beer to ferment, but ended up with 9.50 gallons.

Going back to the fact that I need to take good notes correlates with the fact that I am relying on chance. If this beer turns out phenomenal, I'll never be able to duplicate it without some sort of noticeable difference in character and taste, unless by chance I end up with all the same gravities and efficiencies mentioned above.

So now you know what Efficiency is when discussed in the homebrew community. By now, you should have some better understanding of how it affects your brewing process. Essentially, it affects the cost of the beer if you have to buy more grains than what would be needed on a more efficient system. You can utilize less of every ingredient with better efficiency and end up with more beer at the end of the day if you do it right. Needless to say, I am disappointed because I could have/should have had this all determined months ago. I have some work ahead of me and will report back.

Two new discussions in the works: 1.) The Chimay Clone Outcome and 2.) Using pumps and how to prevent wasted time from day 1.

VIDEO LINK: Just a quick shot at the brewing process. At this point, the mash tun (middle keg) is steeping 30 pounds of grains in 8 gallons of water at 149F. The HLT (right keg) is filled with 9 gallons of water and is in the process of being heated to 167F to use for sparging.

http://www.youtube.com/watch?v=MmwlmxfPmZs


Teaser: The Chimay Clone finished fermenting out at 1.008 from 1.083. Subtract 1.008 from 1.083 and multiply by 131 to get ABV. In this case, we're looking at a 9.82% beer. One and buzzed, two and drunk, three and you'll regret it.