I have two amazing brews on tap and a lager fermenting away as we speak, and have just put a few recipes on the to-do-list as I can't seem to get enough right now. I go through spurts when it comes to brewing, but I am currently at my peak interest, if not ahead of it at this moment.
Sure, i still cultivate 'homebrew', but that has been becoming less and less a thing of the present and more and more a thing of the past. I have instead grown significantly in my ability to produce quality brews. I'm not saying this to brag, but am saying this because my confidence level has increased greatly from a few years back when Bednarczyk got me hooked on this wonderful hobby. Experience rewards us heavily in almost everything we do, and homebrewing is no exception.
Some of you may have heard of a Black IPA i recently brewed. This beer happens to be on tap right now, so I suggest you come over to taste this brew before i run out. I love it! It comes in at 8.3% ABV and is a well balanced combination of malts on the front end with hops on the back end, finishing 'very smoothly.'
Right next to the Black IPA on tap is a Bell's Two-Hearted Ale clone that my father and I brewed. This beer on tap is so close to being an exact replica of Bell's Two-Hearted Ale. It comes in at 7.2 % ABV and is absolutely delicious. Bell's Two-Hearted Ale is an American Pale Ale, thus leaving with me two hopped up ales on tap an a lager in the frontline. This clone is going to be an absolute favorite amongst those hop lovers who try it - I promise you.
This now brings me to the lager that is fermenting away as we speak. It is a Vienna Lager (think Yuengling in taste and color) which requires 30 days of fermenting, 2 days for a diacetyl rest (temperature rest), 30 days of lagering (conditioning at 33 F), and then 3 weeks in the bottles and kegs. I will have 2 cases in bottles and 2 cases in a keg, just in time for the arrival of our baby boy or baby girl. Do the math and this beer will be available for drinking on Feb. 7th, give or take. Our baby is due the following week. We shall call this a birthing beer. You give out cigars and I'll give out the beer!
As much as I enjoy the Black IPA and the Bell's Clone along with the anticipation of the Vienna Lager, I must consider what I will be brewing next. I have some ideas and I'm excited to share. Let's take a look.
There are 2 that are high on my list and they aren't your ordinary beers. They are some big beers, and i think we will all enjoy them. In no particular order, I'm looking to brew a Belgian Quad (the biggest darn belgian beer you can possibly find), which will come in at 11% ABV. I've posted about the Chimay Dubbel I brewed last year. Strong Belgian's aren't easy to brew as you have to mask the alcohol taste in such strong beers via carefully calculated additions of malts and syrups. Anyway, I'm excited for it. The 2nd beer on my list is what I call "Big Burly Brown Ale," which comes in at 7.1% ABV. I may have to work on the name as 7.1% isn't that 'Big' compared to these other beers. The Belgian Quad is a variation of my Belgian Dubbel brewed last year, but this Brown Ale is an untested concoction designed solely on principles. I will limit this brew to a 5 gallon batch (2 cases) as I don't expect to nail it on the first attempt. I base this beer off a personal favorite from Lagunitas Brewing Company, Wilco Tango Foxtrot. If you can find this beer (usually sold individually in 22 oz bottes), please consider trying it. If you enjoy it, this recipe I put together will hopefully be similar.
So, 2 big beers are in the lineup, and one of them will probably be brewed over the holidays just in time for the unveiling of my lager. Two new brews and a newborn to bring it all together. It's going to be a great time!
Until the next...
Friday, November 11, 2011
Friday, November 4, 2011
Homebrew's Captured, Literally
The title says it all!
1.) This is a green beer (a regular glorfied budweiser dyed green for st. patty's)

2.) This is a bavarian witbier I brewed 2 summers ago. It was big hit at the house party. 4.5% ABV

3.) Clearly there is no order here. This is a Black IPA I am drinking now. 8.3% ABV

4.) The beer in the glass is an American Pale Ale i just brewed. It's still a little young. Look at all the good beer that surrounds it (Left Tap Black IPA, Right Tap American Pale Ale, Lagunitas Little Sumpin Sumpin, and DFH Olde School) 7.3% ABV

5.) This is the famous Belgian brew that forced friends of mine to sleep over on a tuesday night. 9.8% ABV and super delicious

6.) Ahh yes, below is the Orange Pale that allowed some many non-believers to believe in the capabilities of homebrew. This is a fantastic brew I will make repeatedly. 6.5% ABV

7.) And this is the Porter that surprisingly so few people enjoyed. This stuff was like engine oil and finished sweet. I was a huge fan but failed to convince the general public. 4.9% ABV

...And there will be more to come. You can count on that!
If i happened to snap a photo of any past homebrews, here they are for your viewing pleasure. Off hand, my most notable beers to date are: Orange Pale Ale, Summer Wheat, A DFH 60 Minute/90 Minute Wedding Beer, Chimaybe Preggers, Big Black Burly IPA, and a recent American Pale Ale.
I've made many other beers, some good, some bad. Let's forget about those and cherish the ones that may be gone, but are not forgotten.
1.) This is a green beer (a regular glorfied budweiser dyed green for st. patty's)
2.) This is a bavarian witbier I brewed 2 summers ago. It was big hit at the house party. 4.5% ABV
3.) Clearly there is no order here. This is a Black IPA I am drinking now. 8.3% ABV
4.) The beer in the glass is an American Pale Ale i just brewed. It's still a little young. Look at all the good beer that surrounds it (Left Tap Black IPA, Right Tap American Pale Ale, Lagunitas Little Sumpin Sumpin, and DFH Olde School) 7.3% ABV
5.) This is the famous Belgian brew that forced friends of mine to sleep over on a tuesday night. 9.8% ABV and super delicious
6.) Ahh yes, below is the Orange Pale that allowed some many non-believers to believe in the capabilities of homebrew. This is a fantastic brew I will make repeatedly. 6.5% ABV
7.) And this is the Porter that surprisingly so few people enjoyed. This stuff was like engine oil and finished sweet. I was a huge fan but failed to convince the general public. 4.9% ABV
...And there will be more to come. You can count on that!
Saturday, February 19, 2011
Increasing Cost Efficiency - Part 2
Hello all!
Here is a very short follow up post to Increasing Cost Efficiency Part 1.
To be short and to the point, I received my barley crusher for the big 30 bday. What a sweetheart I have to give me such a wonderful present. The barley crusher is phenomenal. It has a hand crank which is removeable, allowing me to hook up a drill. There is no way I would ever hand crank it given I use 20-30 pounds of grain in any given batch. I gave it a test run last night and ran a pound of 2-row through it. It was the perfect crush. It wasn't too fine to the point that it was all flour and it wasn't too course to the point where it remained whole kernels, it was the perfect balance.
I bought a 55 lb sack of Maris Otter (a malty, base grain) and just ordered a 55 lb sack of Pilsner 2-row, 27.5 lbs of Crystal 15, and 27.5 lbs of Vienna Malt. So once I recieve the new order I'll have a total of 165 pounds of commonly used grains.
Here is an example of the cost savings I just received.
Here is the Homebrew Supply Store prices:
55 Lbs Maris Otter x $2.25 (per pound) = $123.75
55 Lbs Pilsner 2-row x $2.00 = $110.00
27.5 Lbs Crystal 15L x $2.50 = $68.75
27.5 Lbs Vienna x $2.50 = $68.75
Thus, if purchased at the store, 165 pounds would have cost me $371.25. Expensive, right.
Here is what I paid by ordering through a group of homebrewers who set up a commercial account.
55 lbs Maris Otter x $0.60 (per pound) = $33
55 lbs Pilsner 2-row x $0.61 = $33.55
27.5 lbs Crystal 15L x $0.68 = $18.70
27.5 lbs Vienna x $0.71 = $19.53
$15 freight and fuel charge
Total that up and you can see I just purchased 165 pounds of grain for $119.79. That is a difference of $251.46!!!!!
You can see how much I'm saving now on my grains. Yeah, I now have to store 165 pounds of grain (keep in mind a batch utilizes anywhere from 20-30 pounds), but the amount of dollars saved fully justifies it. Plus, I love the smell of the grains, so when I get bored I can take a nice whiff and get that pleasant smell of euphoria.
That's the wonders of the Barley Crusher.
Aren't you as happy as I am right now.
Thursday, February 3, 2011
Increasing Cost Efficiency
A good friend made a great point the other day. He said, brewing beer is a hobby and hobbies can be expensive. This is mostly true, but not entirely. When you consider my situation, yes it was indeed expensive to build my system and to add even further, my the tap water around here is no good for brewing. My house is 55 years old, so let's just some of the pipes are rusted. I don't drink the water, therefore I won't put it in my beer. When I brew a 10 gallon batch of beer, I typically use 20 gallons of storebought water. Poland springs is $1 a gallon, so you do the math. 10 gallons yields 4 cases so at $20 extra dollars for water, you can see how the cost does add up.
Here's the typical cost breakdown for a recipe. We'll do the math together.
10 gallon batch
20 gallons of water: $1 x 20 = $20
20 pounds of pale malt: $2.20 x 20 = $44
1 pound vienna malt: $2.25 x 1 = $2.25
4 pounds flaked wheat: $1.75 x 4 = $7
2 ounces of Cascades Hops: $2.50 x 2 = $5
1 vial American Ale yeast: $6.75
Total = $85.00
$85 / 4 = $21.25 per case.
Keep in mind this is a very rough, fictitious recipe for illustrative purposes. 25 pounds of grain for a 10 gallon batch would create a 5.5 - 7.5% beer, so not BMC (Bud, Miller, Coors). When you consider the cost of $21.25 per case of beer for a Pale Ale it sounds pretty good, right? Sure, it definately does. But guess what, that cost could easily be improved. I see 3 ways for this to happen: 1 that is easily achievable, and 2 that aren't.
Let's look at what isn't feasible first. $20 of the total cost comes from water. My solution is to move somewhere else that has a better water profile. This could be municipal water or tested well water. Municipal water is used in many breweries across the world and produces great beers alike. Until I move, I am stuck with rusty water at $20 per 10 gallon batch. Even though salts and minerals are available to homebrewers, I don't believe any will get rid of rust.
The second cost factor that sticks out is the yeast. The yeast is $6.75 per vial. Usually the equivalent of 2 vials is required for a 10 gallon batch. I have a yeast starter (stir plate) that can step up 1 vial into the equivalent of 2 vials. Sometimes, my poor planning or desire to brew something now doesn't afford me the opportunity to step up 1 vial of yeast, thus forcing me to purchase 2 vials of yeast.
Yeast can actually be cultured from previous batches or even from slurry at the bottom of certain beers. The process is called 'yeast washing' and requires much work. Not only is work involved but there are limitations on how long yeast remains viable. So we'll scratch this potential cost saver for now.
The biggest cost saver available to me is in the grain bill. $53.25 of the $85 comes from the grain itself. My sweetheart got me a barley crusher for my birthday, so I no longer have to go to the homebrew store to purchase grain at approximately $2.25 per pound. I can now buy bulk and store it for long periods. What's even better is that with my barley crusher I can crush the grain to my liking. In the past, what was given to me was what I got. Not anymore.
So numerous users on Homebrewtalk.com organize these group buys where they order grain in bulk from the commercial brewery suppliers. The cost savings are enormous. Literally, 30 local homebrewers order up as much grain as they can hold at home and get it delivered to a valid commercial loading dock. Everyone then meets up and takes their cut. The last Philly order brought in 4620 pounds of grain amongst 27 buyers. They ordered from North Country Malt Supply. You can check out their sales prospectus here at a discounted rate (see prices by weight): http://www.countrymaltgroup.com/downloads/NC%20Malt%20Supply%202010%20Sales%20Book%2009-27-10.pdf
Hopefully you checked out the above link and saw that they carry virtually every grain available along with hops and sanitizers, etc at very affordable prices. Needless to say, I am purchasing grain on the next shipment (which is real soon). Let's take a look at what that same recipe would cost now.
10 gallon batch
20 gallons water: $1 x 20 = $20
20 pounds pale malt: $0.67 x 20 = $13.40
1 pound vienna malt: $0.71 x 1 = $0.71
4 pounds flaked wheat: $0.50 x 4 = $2.00
2 ounces Cascades Hops: $.050 x 2 = $1.00
1 vial American Ale Yeast: $6.75
Total = $43.86
There you have it! The recipe that has been costing me $85 is now costing me $43.86, a savings of $41.14. That makes the same case of beer now cost $10.97. Now that's cheap. Keep in mind that some recipes cost more (ie. Belgian Dubbels/Trippels and IPA's) and some cost less (wheat beers and session beers in general). I am now at a point were I could feasibly brew $5 cases, granted I will have to store 55 pounds of each grain I purchase, or any split, third, or quarter bags I buy.
Just think, when we eventually move to a residence that has a better water profile, I'll be brewing up $3 cases. If I ever get into selling beer, it could be profitable at a rate like that.
Hope you enjoyed another blog by Halbe.
Tuesday, January 4, 2011
The New and Improved Homemade Bazooka Tube
Ok, so here's another $12 modification I did. I bought the bazooka tube last week and put it to the test. It worked well, but could be even better so I set out on a mission. I did some perusing on the homebrewtalk and looked at variations of homemade bazooka tubes. Quickly, I jumped on McMaster Carr's industrial needs website and ordered 1 stainless steel hose clamp and a 30x30x.0056 stainless steel mesh screen, delivered for $12.
I did this because the purchased bazooka screen is straight and my drain port is about 3 inches above from the bottom of the kettle, therefore when I brewed the orange pale ale and tested out the new mods I had to tilt the keg when trasnferring into my fermenter for the last 3 gallons. It's no big deal really, but I like automation, hence the overkill homebrew rig. This new mod would allow my to use my 90 degree siphon tube and suck up all wort, literally all wort. I did a test tonight and took pictures, because sometimes pictures are better than words.
Luckily, trash day isn't until tomorrow, so I still had my lawn can (yes, Bristol township collects lawn debris weekly and they have a trash can dedicated to it) filled with spent grains and a pile of 6 ounces of hops on top. Yeah, i consider it lawn debris and they don't seem to mind either as they do collect it from me. Needless to say, I scooped out the 6 ounces of hops and even a few scoops of whole grains and put them in my boil kettle with 5 gallons of water. I heated up the kettle for about 10 minutes until the hops infused with the water.
The test here assumes that my hopbag didn't exist and I only relied on my homemade bazooka screen. Albeit, I will be using both on future brews for added comfort and convenience of chilling and recirculating the wort. FYI, 6 ounces is a lot of hop additions for one brew (hence the pale ale I was making).
Check out the pics of the homemade bazooka screen in action.
 Here is a pic from a side view. You can see the 90 degree elbow siphon tube.
 After installing the bazooka screen, I boiled 5 gallons of hop water. I funneled it out and this is what you see; hoppy green water.

Then I let it funnel through the super fine funnel mesh and this was all the hops that got through. You'll never collect all of these tiny hop particles, but this is impressive. Here is the funnel with about 1 tablespoon of hop particles in 5 gallons passing.
Here is the bazooka screen after doing it's job. Some particles were on the inside of the screen as some did pass through. As you can see from above, only .01% of the hop sludge made its way through.


I did this because the purchased bazooka screen is straight and my drain port is about 3 inches above from the bottom of the kettle, therefore when I brewed the orange pale ale and tested out the new mods I had to tilt the keg when trasnferring into my fermenter for the last 3 gallons. It's no big deal really, but I like automation, hence the overkill homebrew rig. This new mod would allow my to use my 90 degree siphon tube and suck up all wort, literally all wort. I did a test tonight and took pictures, because sometimes pictures are better than words.
Luckily, trash day isn't until tomorrow, so I still had my lawn can (yes, Bristol township collects lawn debris weekly and they have a trash can dedicated to it) filled with spent grains and a pile of 6 ounces of hops on top. Yeah, i consider it lawn debris and they don't seem to mind either as they do collect it from me. Needless to say, I scooped out the 6 ounces of hops and even a few scoops of whole grains and put them in my boil kettle with 5 gallons of water. I heated up the kettle for about 10 minutes until the hops infused with the water.
The test here assumes that my hopbag didn't exist and I only relied on my homemade bazooka screen. Albeit, I will be using both on future brews for added comfort and convenience of chilling and recirculating the wort. FYI, 6 ounces is a lot of hop additions for one brew (hence the pale ale I was making).
Check out the pics of the homemade bazooka screen in action.
Here is a pic from a side view. You can see the 90 degree elbow siphon tube. After installing the bazooka screen, I boiled 5 gallons of hop water. I funneled it out and this is what you see; hoppy green water.Then I let it funnel through the super fine funnel mesh and this was all the hops that got through. You'll never collect all of these tiny hop particles, but this is impressive. Here is the funnel with about 1 tablespoon of hop particles in 5 gallons passing.
 Obviously, everything that was trapped by the bazooka tube is left behind, as it is supposed to be. Here is the boil kettle filled with hop sludge and grain, amongst the bazooka screen.
Here is the bazooka screen after doing it's job. Some particles were on the inside of the screen as some did pass through. As you can see from above, only .01% of the hop sludge made its way through.
As you can see here. I siphoned everything out except for the sludge and tilted the keg on it's side to show that about 2 cups of wort are remaining. I could fight for those last 2 cups, but I'd rather account for it in Beersmith (brewing software) and calculate my batch size for .25 gallons lost to sludge. Gotta love brewing software.
That's it for today folks. Now I just need your help in deciding what to brew next in order to put the hopbag and homemade bazooka screen to the test.
Cheers!
Sunday, January 2, 2011
Beer Styles - BJCP - What Should I Brew?
I am constantly pondering for a beer to brew and am always going back to my favorite styles; belgians, wheats, and IPA's. The reality is that there are numerous beer styles to choose from. The following styles are recognized by the Beer Judge Certification Program (BJCP).
The following is a quote from their website www.bjcp.org explaining their purpose.
The BJCP is the official database for beer styles and defines the parameters needed to meet a particular style. They judge beer, mead, and cider. Here is the list. So read them and let me know what I should brew next. You can find the full style guidelines here: http://www.bjcp.org/docs/2008_Guidelines.pdf
American Amber Ale
American Barleywine
American Brown Ale
American IPA
American Pale Ale
American Stout
American Wheat or Rye Beer
Applewine
Baltic Porter
Belgian Blond Ale
Belgian Dark Strong Ale
Belgian Dubbel
Belgian Golden Strong Ale
Belgian Pale Ale
Belgian Specialty Ale
Beglian Tripel
Berliner Weiss
Biere de Garde
Blonde Ale
Bohemian Pilsner
Braggot
Brown Porter
California Common
Christmas/Winter Specialty Spice
Classic American Pilsner
Classic Rauchbier
Common Cider
Common Perry
Cream Ale
Cyser
Dark American Lager
Doppelbock
Dortmunder Export
Dry Mead
Dry Stout
Dunkelweizen
Dusseldorf Altbier
Eisbock
English Barleywine
English Cider
English IPA
Extra Special/Strong Bitter (ESB)
Flanders Brown Ale/Oud Bruin
Flanders Red Ale
Foreign Extra Stout
French Cider
Fruit Beer
Fruit Cider
Fruit Lambic
German Pilsner (Pils)
Gueuze
Imperial IPA
Imperial Stout
Irish Red Ale
Kolsch
Lite American Lager
Mailbock/Helles Bock
Metheglin
Mild
Munich Dunkel
Munich Helles
New Englan Cider
Northern English Brown Ale
Northern German Altier
Oatmeal Stout
Oktoberfest/Marzen
Old Ale
Open Category Mead
Other Fruit Melomel
Other Smoked Beer
Other Specialty Cider/Perry
Premium American Lager
Pyment
Robust Porter
Roggenbier (German Rye)
Saison
Schwarzbier (Black Beer)
Scottish Export 80
Scottish Heavy 70
Scottish Light 60
Semi-Sweet Mead
Southern English Brown Ale
Special/Best/Premium Bitter
Specialty Beer
Spice, Herb, or Vegetable Beer
Standard American Lager
Standard/Ordinary Bitter
Straight Lambic
Strong Scoth Ale
Sweet Mead
Sweet Stout
Traditional Bock
Traditional Perry
Vienna Lager
Weizen/Weissbier
Weizenbock
Witbier
Wood Aged Beer
That's it folks. Which of these seem appealing?
cheers!
The following is a quote from their website www.bjcp.org explaining their purpose.
"The purpose of the Beer Judge Certification Program is to promote beer literacy and the appreciation of real beer, and to recognize beer tasting and evaluation skills. We certify and rank beer judges through an examination and monitoring process.
The BJCP was founded in 1985 and has administered the Beer Judge Examination to 5,875 individuals worldwide. 3,647 are currently active judges in the program, with 540 holding the rank of National or higher. Since we started keeping detailed records, our members have judged over 590,931 beers and we have sanctioned over 4,208 competitions. "
The BJCP is the official database for beer styles and defines the parameters needed to meet a particular style. They judge beer, mead, and cider. Here is the list. So read them and let me know what I should brew next. You can find the full style guidelines here: http://www.bjcp.org/docs/2008_Guidelines.pdf
American Amber Ale
American Barleywine
American Brown Ale
American IPA
American Pale Ale
American Stout
American Wheat or Rye Beer
Applewine
Baltic Porter
Belgian Blond Ale
Belgian Dark Strong Ale
Belgian Dubbel
Belgian Golden Strong Ale
Belgian Pale Ale
Belgian Specialty Ale
Beglian Tripel
Berliner Weiss
Biere de Garde
Blonde Ale
Bohemian Pilsner
Braggot
Brown Porter
California Common
Christmas/Winter Specialty Spice
Classic American Pilsner
Classic Rauchbier
Common Cider
Common Perry
Cream Ale
Cyser
Dark American Lager
Doppelbock
Dortmunder Export
Dry Mead
Dry Stout
Dunkelweizen
Dusseldorf Altbier
Eisbock
English Barleywine
English Cider
English IPA
Extra Special/Strong Bitter (ESB)
Flanders Brown Ale/Oud Bruin
Flanders Red Ale
Foreign Extra Stout
French Cider
Fruit Beer
Fruit Cider
Fruit Lambic
German Pilsner (Pils)
Gueuze
Imperial IPA
Imperial Stout
Irish Red Ale
Kolsch
Lite American Lager
Mailbock/Helles Bock
Metheglin
Mild
Munich Dunkel
Munich Helles
New Englan Cider
Northern English Brown Ale
Northern German Altier
Oatmeal Stout
Oktoberfest/Marzen
Old Ale
Open Category Mead
Other Fruit Melomel
Other Smoked Beer
Other Specialty Cider/Perry
Premium American Lager
Pyment
Robust Porter
Roggenbier (German Rye)
Saison
Schwarzbier (Black Beer)
Scottish Export 80
Scottish Heavy 70
Scottish Light 60
Semi-Sweet Mead
Southern English Brown Ale
Special/Best/Premium Bitter
Specialty Beer
Spice, Herb, or Vegetable Beer
Standard American Lager
Standard/Ordinary Bitter
Straight Lambic
Strong Scoth Ale
Sweet Mead
Sweet Stout
Traditional Bock
Traditional Perry
Vienna Lager
Weizen/Weissbier
Weizenbock
Witbier
Wood Aged Beer
That's it folks. Which of these seem appealing?
cheers!
Thursday, December 30, 2010
The Good....and the Bad....Back to Back Brew Sessions
12.27.10 began the nightmare of the Drunken Uncle Dunkelweizen. Sure, I thought it would be easy. I made a yeast starter Christmas night and was set up for an easy morning sanitation and simple dark wheat brew session. So I thought at least. I should have realized almost immediately that this was going to be bad. I hooked up the hose to start washing down my system when it froze almost instantly. No worries though, I disconnected the hoze and hooked it up where my washer connects to the water supply.
The overall brew session went fine in the first half of the day. We hit our strike in temps, held our mash temps, and properly stepped up our mash. It was when we sparged that we noticed a great deal of grain passing through the silicone tubing. I've noticed it before when doing batches so I didn't think much of it. The false bottoms help to keep grain out, help being the key word. We would later realize that about 2 gallons of volume was due to grain occupying the boil kettle.
Needless to say, we couldn't tell how much grain was in the boil kettle until we drained the cool wort out, but cooling the wort turned out to be a 3 hour fiasco. Grains got through the 3-piece ball valve, but clogged in the therminator (lead chill plate system).
Initially we weren't sure of where the clog was coming from so we tested all avenues of possibility. We confirmed that flow was passing through the 3-piece drain valve, through the pumps and back up through the outlet side of the pump, but not the therminator. We put the keg in a pile of snow but the snow was not match for the volume of hot wort. It was at that point we decided to drain out the wort into the fermenters, cap it with an airlock to prevent contamination, and let it sit over night to chill before pitching the yeast.
While it was fun in the beginning, it quickly became a brewer's nightmare and put a damper on the day. The good news is that we were sitting at 1.059 OG and pulled a quick fermentation time. The bad news is that we were supposed to extract 11.00 gallons of wort and ended up with 9+ gallons.
Here's the Drunken Uncle Dunkel fermenting through.
 She'll pull through nicely I'm sure with that spicy, phenolic Weihenstephan Yeast, though I don't think I've ever had a true DunkelWeizen. First time for everything.
A Restless Evening
After that horrible brew session, I determined myself to remedy the situation. http://www.homebrewtalk.com/ was the source for some good answers. Here's what I came up with:
- A False Bottom is not enough by itself to stop trub and grain from getting through.
- A Hopbag adds protection
- A kettle screen (bazooka screen) supplements the grain bag and keeps everything out
- A whirlpool helps to keep trub to sides of kettle when draining.
I moved ahead with a few of these options. I bought a kettle screen and constructed a hopbag solely from homedepot parts. The hopbag was nothing more than 4 10" bolts, a 5" PVC connector pipe , a 5 gallon nylon paint strainer bag, and an adjustable clamp.
The hopbag is exactly what it says, but also more. When I transfer wort from the mash tun into the boil kettle, I let it pass through the hopbag to collect any loose grains, etc. I can then remove any loose grains collected and achieve my boil volume. Then, when I boil and add hops, some of the trub will remain in the hopbag, but unfortunately not all. The kettle screen adds to the equation by blocking any particles from passing through the drain valve. Marvelous!
Today I put the modifications to the test, and let me tell you was I pleased. I brewed up 10 gallons of Orange Pale Ale and ended up with 10 gallons in the fermenter. Here are some pics and videos of todays solo brew session.
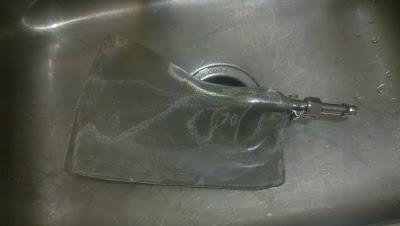
The Hopbag I built for about $7.
 Hopbag while transferring wort into boil kettle.
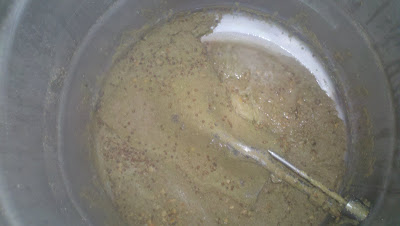
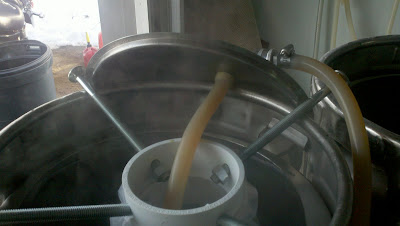 Hopbag with grains after transferring wort into boil kettle. It caught them
 Hops in hopbag.
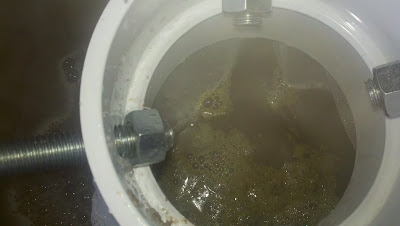
This is the setup when chilling wort with hose.
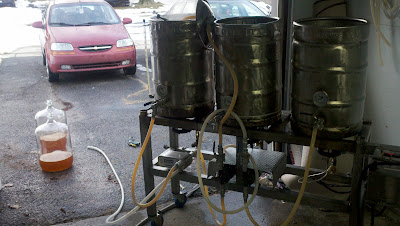 This is the setup chilling the wort with a recirculated ice bath
 Here is a video of the chilling process, part 1: http://www.youtube.com/watch?v=M6nZ_qRwrbw
 Here is a video of the chilling process with a recirculated ice bath made from snow, part 2: http://www.youtube.com/watch?v=aCfs1EX29g8
Chilled wort: 65F in a little over 15 minutes.
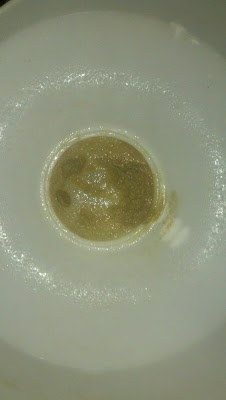
 A lot of trub still gets past the hopbag as you can see here on the kettle screen.
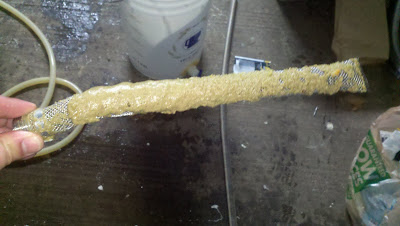
Cheers!
Subscribe to:
Posts (Atom)
