Setting Up
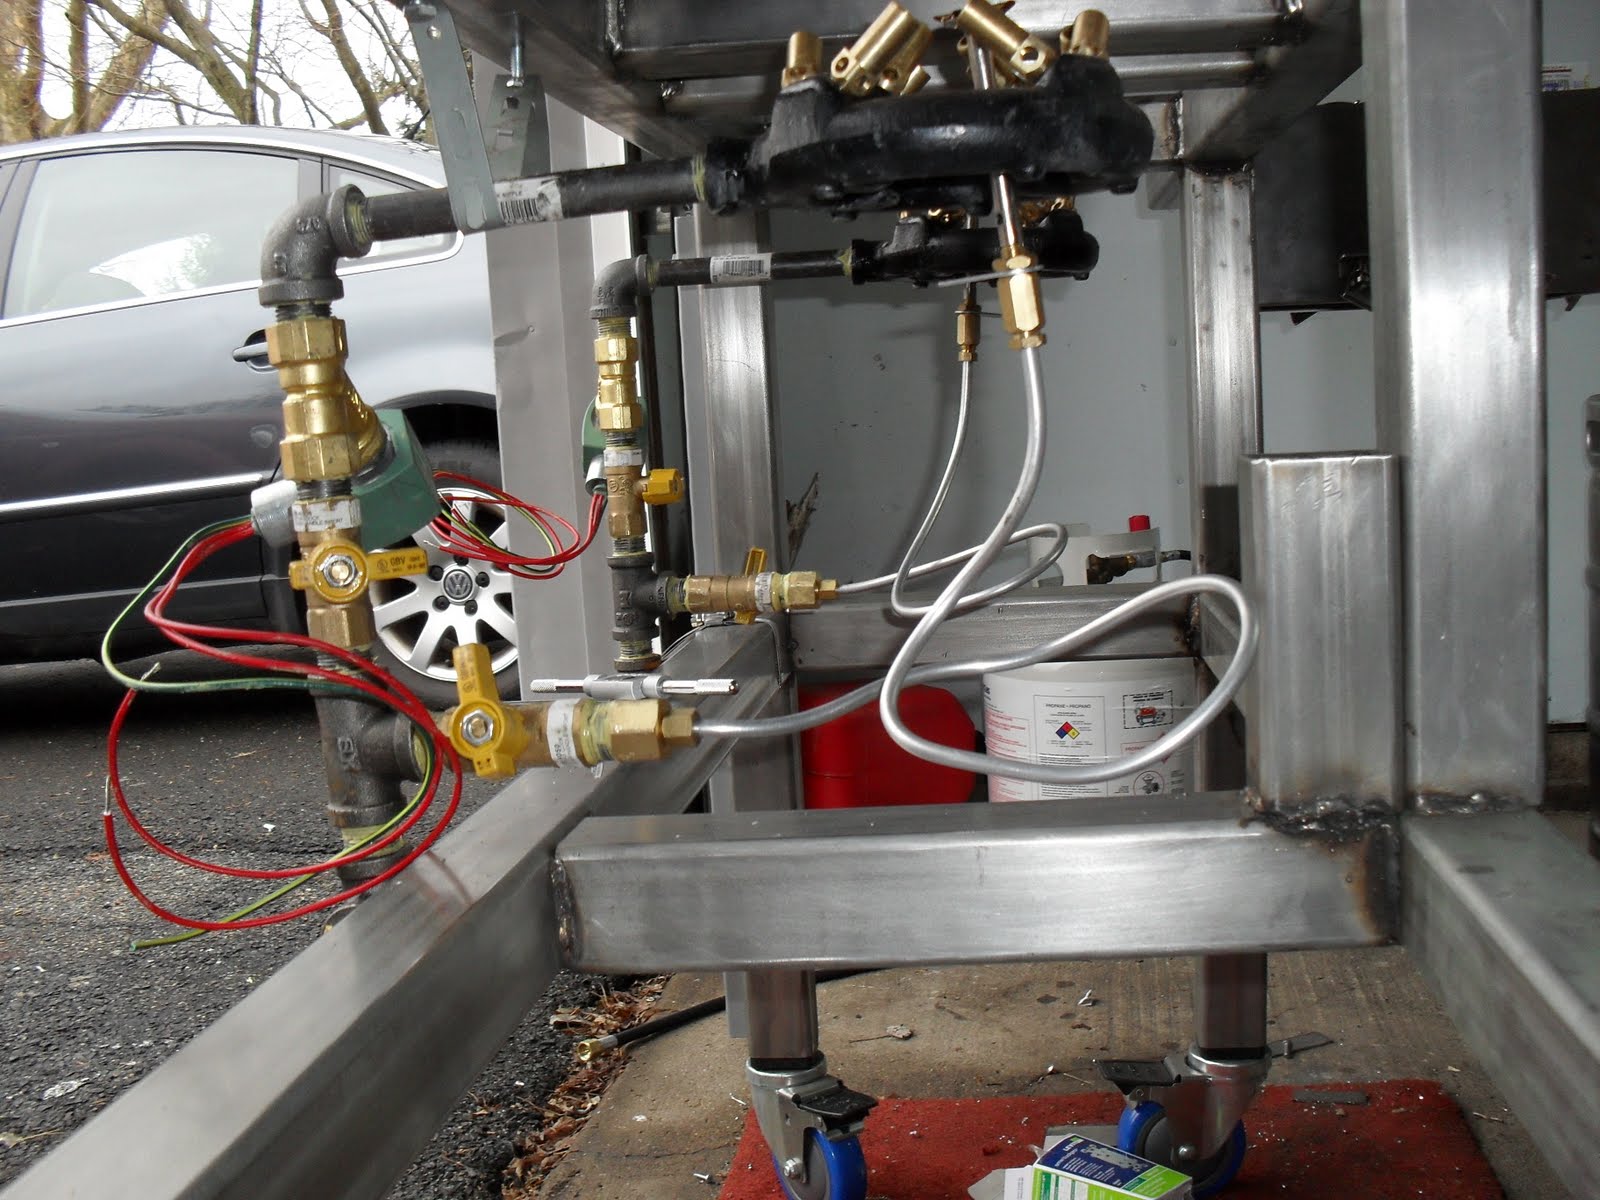
Setting up is the easy part about this brewery. It's already set up. It only requires some standard procedures in order to operate. Another reason everything is stainless steel is for easy sanitizing. Sanitation is 70% of brewing, so it's a crucial element. I use 2 sanitizers - Iodopher and Powder Brewery Wash (PBW). I can take my lids, hoses, quick disconnects, ball valves, and miscellaneous fittings and put them all in a bucket filled with Iodopher. The kegs themselves will be sanitized with PBW. During today's test run I didn't sanitize at all because I wasn't making beer, I was simply testing the brewery for any malfunctions.
Watching It Go Down
First, I ran to Home Depot and purchased a second propane tank in the event I ever run out of propane in the midst of a brew session. Then, I found a recipe for an American Wheat and mocked the recipe instructions. The recipe was an 11 gallon batch of American Wheat, which required 9.4 gallons of water for the HLT and 8.725 gallons of water for the MLT. I simply used garden hose water and filled up the two vessels. The recipe called for HLT temps of 184 F and MLT temps of 145 F.
I then powered up the control panel and turned on my temperature controllers. The water was reading 50 F in both vessels. I wonder if my tap water will be 50 F in the middle of a heat wave. Being that this was the first time I fired up my brewery, I was careful to take notes on just about all changes that occured. Moving along, I created set points as per the recipes instructions, setting the HLT to 184 F and the MLT to 145 F.
The following temps-over-time occurred, yielding some interesting evidence:
 The above chart tells me a few things. Both kegs had the same starting values of 50 F. In just 22 minutes there was a 7 degree difference between the MLT and the HLT. In 30 minutes, there was a 10 degree differnce which pretty much held that way until the MLT hit 145 and turned off. This tells me that the MLT burner is putting out more btu's than the HLT. I'm not worried about it though. The above data also tells me to be careful about my set point temperatures because after the burner turns off the temps continue to increase. The MLT increased 8 degrees between 2:56 and 3:22 and the burner wasn't even on. I also recorded some other interesting data. Don't forget that I also have analog temperature gauges on each keg. I was reading the analog gauge on the MLT both while the burner was on and after. The digital temperature probe sits at the bottom of the keg and the analog is in the middle. I need to take into account the differences in distance to the flame. At 3:22, the MLT burner was off and the digital temperature controller was reading 153. However, the analog was reading 148. My original set point was 145, so i exceeded that on both regards. It shouldn't come to any surprise that the top of the keg water is cooler than the bottom. I do realize that when i dump room temperature grains into the MLT this will take about 2 degrees off the temps, giving me 151 and 146. I will probably set my differential to 2 degrees less than recommended. -2 degrees minus 2 degrees when taking into account room temperature grains would give me about 149 and 144. That's good enough for beer man!!!!
I was a little disappointed in how long it took to heat up 9.4 gallons to 184 F from 50 F (1:02 to be exact), but I can deal with it. I was running the burners at about 50%. For the HLT I could run it at 100% and cut out some time, but with the MLT I can't risk scorching the grains. I'll keep it as-is. I had the valves open 100%, but had the PSI regulator at about 50%. I burned through about 1/8 off the propane tank. That's good news.
After I succeeded in hitting my temps I moved along to the chilling faze. I tested the BK burner just to make sure it properly operated, but didn't want to sit there and watch it boil water for 60 minutes. If i was boiling beer, it would have been different :)
Chilling the Beer
The chilling faze is important in the beer making process. Simply put, the idea is to get the beer from boiling temperatures to about 68 F as fast as possible in order to pitch the yeast. The old school way is to fill a bath tub with ice water and put the keg in there to chill. That can take an hour or two, sometimes more. Some people use wort chillers, which consist of copper or stainless tubing that sits in the keg, where cold water is circulated through it. I myself purcased the Therminator, which has got to be the coolest device in homebrewing, just very expensive.

The therminator has 2 inlets, and 2 outlets. There is a wort inlet/outlet and a water inlet/outlet. There are 2 chambers in the therminator, one for the beer and one for water. theyt do not mix. I use Pump 1 to recirculate the beer through the therminator and attached a garden hose to run 50 F water through the therminator as well. At 5 gallons per minute, I was able to reduce 140 F beer (water today) to 68 F in 10 minutes. I'll take that any day.
That was it for today. A quick clean up and blog post will call it quits. I will be brewing the first batch in about 2 weeks. More updates to come.
cheers!