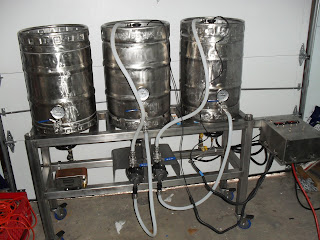
So in November I decided to take the leap and began looking at various designs. There are gravity fed systems which rely on gravity for the flow of wort from one kettle to the next, or single tier systems that rely on pumps and/or siphons to get the wort from one kettle to another. I didn't like the gravity fed systems as they tend to sit up pretty high. I didn't want something in my garage that was towering the ceiling, so I went with the single tier system. It is 52" wide and holds 3 kegs. From left to right, the Boil Kettle (BK), Mash Lauter Tun (MLT), and the Hot Liquor Tun (HLT). The system I went with is known in the homebrew community as H.E.R.M.S. This is an acronym which reads Heat Exchanging Recirculating Mash System.
THE STAND
The brewery, which is yet to be named, consists of a stainless steel structure composed of 40 feet of 2" x 2" x 1/8" square tubing. Stainless doesn't rust, which was an appealing factor when choosing my metal. It sits on wheels for easy transport to the driveway (where I will brew). 40 feet of stainless steel tubing weighs roughgly 200 pounds, so you can see the need for wheels on the stand. As you can see from this picture, there is just the right amount of space for the BK, MLT, and HLT.

Thanks to Joe the Welder, we were able to weld this together over one weekend. It took a lot longer than originally anticipated, but turned out good enough for government work, and good enough for beer. Some welds turned out great, some were adequate, and others were a complete embarrasment. It must have been the hex chrome getting to us because i think the welds got worse as we progressed.
THE KETTLES
Billy D was kind enough to supply me with 3 kegs, which serve as the BK, MLT, and HLT. It took some preparation to get them to serve as a kettle, but with stainle
 ss steel kettles in the 15 gallon range, I just saved myself about $900. Kegs are stainless steel FYI. This is why they increased deposits on kegs a few years back. The kegs are simply worth more than a $10 deposit. In fact, they are worth more than $30, but commercial breweries can only implement a deposit so high before they scare off customers. Anyway, I spent some time polishing up the kegs, making them look pretty - cutting out the tops of the kegs, and welding in 2 couplings per keg. The lower coupling on each keg serves as the drain outlet and the upper coupling houses an analog temperature gauge.
PLUMBING
After working on the stand and the kegs, came the fun part - the Gas Plumbing and the Control Panel. It was time to make this system operational. I ordered up some 10-tip low pressure jet burners with a self-standing pilot. The actual plumbing was bought at Home Depot and was no more than $50. I'm no professional plumber, and I'd rather keep it that way, but I think I am actually at code with this thing. The burners operate from an adjustable PSI regulator hooked up to a propane tank. The plumbing runs across the stand horizontally and then has vertical shoots which house the burners. Each burner has a ball valve for the pilot (to regulate gas flow) and a ball valve to the burner (again, to regulate gas flow). The middle burner (MLT), and the right burner (HLT) have an asco valve associated with the plumbing. These asco valves are electrical, and are normally closed in position by default. The valve sends signals to the control panel, which operates my temperature controllers, telling the valve when to open and when to close, allowing or disallowing a flame to come out of the burner. This regulated, automated burner allows me to set a temperature point and hold steady. For example, If i wanted to set my HLT to hold at 185 F, the digital temperature controller signals the asco valve to open, allowing a flame to heat up the keg. When the temperature of the water in the HLT hits 185 F, the asco valve shuts, turning off the burner until the temp drops to 184 F, where it then fires back on until it his 185 F again, process repeating.
Take a look at the temperature controllers on the control panel and the burner set up. The temperature controllers have electrical probes that sit in the kegs, taking constant temperature readings of the HLT and MLT. The Asco valves are the green valves which has the wiring.
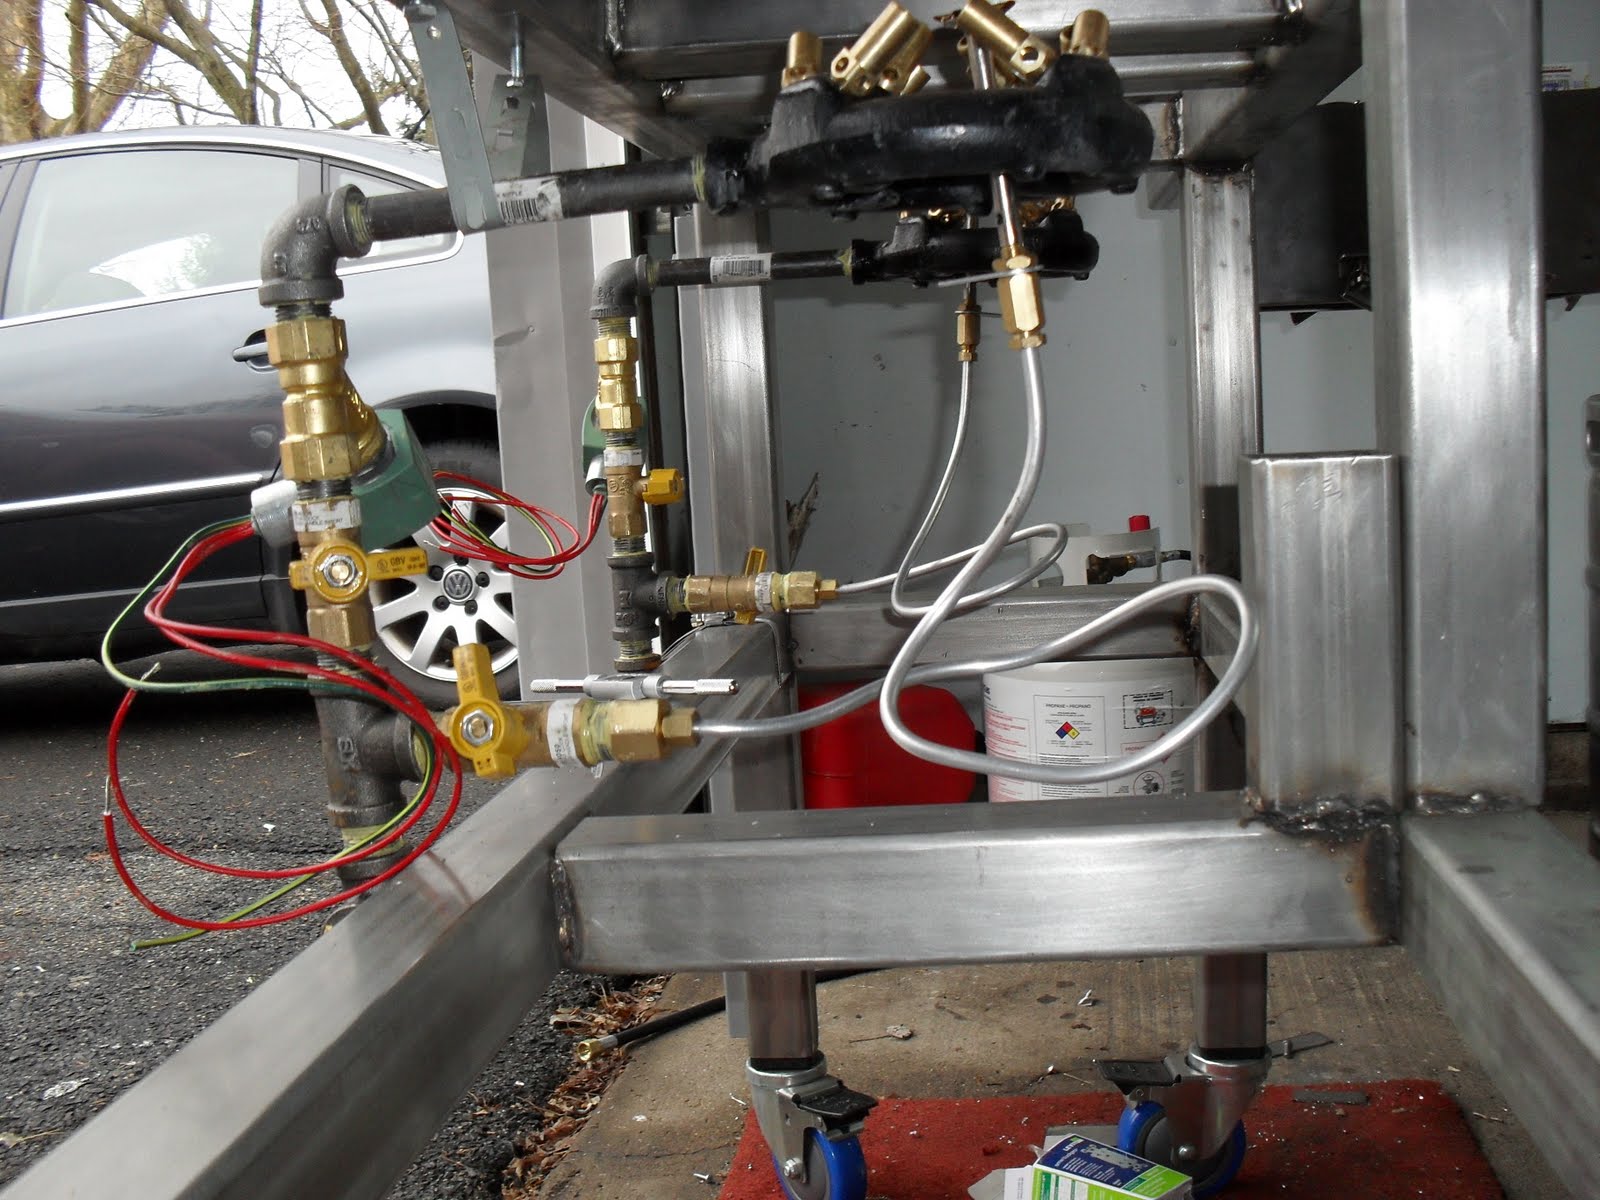

After I wired up the valves to the control panel I was able to test out the burner.......and wow!!! These burners put out some serious juice. It literally sounds like a mini jet engine. I was very skeptical about being to close at first. The sound was somewhat frightening. I had a few gas leaks at first, but pipe dope on every connection sealed everything up very well.
The control panel has a few components to it. It has a main power supply which runs to the wall outlet of my house, or any house for that matter. It has 7 switches in total: Main Power switch, Left Digital Temperature Controller, Right Digital Temperature Controller, Left Asco Valve, Right Asco Valve, Pump 1 and Pump 2. The wiring was color coded, Green being ground, White being Neutral and Black being Hot. It was messy, but it worked.


Next came the final stages of this build, the pumps and hoses.
PUMPS
The pumps and hoses assist in the transfer of wort, water, and mash from one keg to the other. These kegs get extremely hot in just a few moments of operation and also get extremely heavy when filled with liquid and grains. I could have saved some money and  just used a siphon, but that would be no fun. The pumps do all the work. There are two pumps which operate simultaneously and independently depending on the current task. The hoses themselves all have quick disconnects for interchangeability. I also put a safety cover over the pumps to prevent them from any spillage.
Finished Product
Take a look. See for yourself. Judge for yourself when you drink some of the delicious product that comes from it. I have a twin tap kegerator so i will have two beers on tap at any given point. I intend to brew in just a few weeks, so it will be about 6 weeks from today that we can enjoy this beer together. If you can't make this round, there will be plenty more to come.

No comments:
Post a Comment